TO WATCH AN ONLINE WEBINAR PRESENTED FOR GARDENS 4 HARVEST, CLICK HERE
For a downloadable version of this page, please click here.Growing Vegetables from Seed - Steps to Success
Why grow from seeds?
It’s good to grow many vegies from seed for a variety of reasons:
- It’s fun – and it's always exciting seeing the seeds germinate.
- The variety of vegetables available to grow from seed is much greater than available in seedlings.
- It’s much more economical buying a packet of seed than a punnet of seedlings.
- Some are very easy to grow from seed while others just don’t do well when transplanted from seedling punnets.
- Excess seedlings become another “commodity” to take to swap-meets.
- If growing heirloom varieties, seed saving can be done and so you minimise the inputs into your garden – closing the loop.
- If you've grown it in your vegetable garden and you know that the particular variety does well, you have a case of a vegetable thriving in your conditions, so it makes sense to keep growing from the stock you had.
However, you do need to be a bit more organised, knowing what to sow when and not missing the time bracket. It is also more time consuming, sometimes with a few extra steps involved before the seedlings are ready to plant.
What is involved?
SOIL TEMPERATURE
This is one of the most critical factors when getting seeds to germinate.
Seeds of vegies grown over winter won’t germinate well in warm soil and warm season vegie seeds need heat to activate germination.
Check soil temperatures by:
- Using charts to indicate when the timing might be right. This depends on many factors though and not just the calendar.
- Using a soil thermometer for more accurate readings.
- Using the palm of your hand on the soil to feel the warmth
When the soil is still cold outside, you can start summer vegetables by:
- Germinate seeds indoors
- Use a hot spot in your house eg top of an indoor hot water unit; or the top of the refrigerator - Use a purpose-made heat bed for seed-raising
- Use a compost bin that has active compost inside. This provides a no-cost heat bed - as well as great compost!
When the soil is still too warm outside, you can start winter vegies by:
- Germinating seeds indoors in punnets or pots and keeping them in the shade outdoors until the outdoor temperatures have cooled down in autumn.
DEPTH OF SOWING
The general rule is to cover the seeds with soil ONLY 1 to 2 times the depth of the size of the seed itself, eg very small seeds may need only a very light covering of soil. Too deep and the seed doesn’t have the energy to push through the soil surface to start to get its energy from the sun.
DIRECT SEED SOWING
This refers to sowing your seeds directly into the soil in which they will continue to grow. No transplanting is involved but you will probably need to thin out excess seedlings if you have sown too thickly.
It is used when soil temperature is in the correct range and for:
- Easy-to-handle seeds eg legumes (peas, beans, broadbeans);
cucurbits (eg pumpkin, cucumber, melons);
sweetcorn and sunflowers - Easy to germinate seeds eg lettuces
- Seedlings that suffer being transplanted from punnets
- eg carrots and parsnips (roots become distorted)
- basil, spinach, coriander (suffer transplant setback)
HINTS for sowing carrots
Mix the fine carrot seed with some sand in a jar. Make shallow drills in finely tilled moist soil (one that has not been recently fertilised) and dribble the seed/sand mixture in the drills. Water carefully. Cover the drill with some shadecloth or a narrow plank of wood to help avoid the seed drying out. Check regularly to see if germination has occurred and lift the cover as soon as you see green. Thin the growing stems to about 5cm apart and then eventually to about 10cm apart. If this is all too hard, there is carrot seed tape available which makes it very easy to sow.
HINTS for sowing basil, spinach, coriander
Sowing direct is tricky with these as they are very temperature dependant (basil needs heat, spinach and coriander prefer cooler soil temps). Instead of sowing directly in the ground, use the 2-step method described below (using several seeds per biodegradable pot) where you can provide the correct temperature for germination. When they get big enough, plant the whole pot in the ground, or unwrap the newspaper pot before planting. You could also sow them in the soil (at the correct temp) but cover the rows with fine mesh or similar to keep out marauding birds until the seedlings can look after themselves.
IN-DIRECT SEED SOWING
This refers to sowing seed in a controlled situation, such as in a pot or punnet, allowing it to grow to a particular size and then transplanting into the final soil to continue to grow. It is an extra step (or 2) so you might wonder why? Why not sow directly into the soil and save yourself the hassle of transplanting.
The reasons are usually for seeds
- sown early, before the soil temperature is in the right range to get the seed to germinate. It might be still too warm (such as for lettuce, coriander and spinach) or too cold (such as for tomatoes, eggplant and capsicum). We start these early as the growing season where you live might not be long enough if you sow when the soil temperature is right.
- or that are very small to handle and may get lost in the garden before germinating; or get eaten by pests as soon as they come up!
You will need some sort of seed-raising medium. There are a variety of different ways you can make your own without resorting to specialist seed-raising mix. Seed-raising mix is different to potting mix as it serves only as the medium to hold the seed moist until it germinates. Once germinated, you will need to feed the seedling to keep it growing strongly. The seed itself contains enough food to get it germinating so the seed-raising mix at the start need not be too nutritious.
However, seed-raising mix isn't my favourite option as gardeners don't tend to use it properly. Following the instructions on the bag will help as it stipulates that it is used only for GERMINATING and then the newly emerged seedlings need to be potted up to ensure continued growth.
You can use
- a seed-raising mix, available at nurseries
- good quality potting mix sifted to remove large pieces
- make your own from a
50:50 mix of sifted compost + propagating sand;
or 50:50 coir peat: propagating sand
IN-DIRECT (2-step) SEED SOWING
STEP 1
Sow the seed in the moistened mix in a biodegradable pot or seedling punnet and cover seed with twice its depth of the mix. Water carefully. Keep the pots or punnets in an indoor position until you see signs of germination. Do not allow the soil to dry out as this will kill emerging seedlings. (It might be helpful to cover the punnet or pot in a clear plastic bag to recycle any water that evaporates, but this must be removed as soon germination starts).
Use seedling punnets for lettuces, onions and silverbeet.
STEP 2
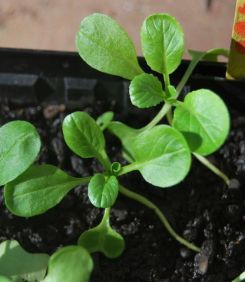
The cotyledons (baby leaves) will appear first, followed by the first set of true leaves. Once the seedlings appear, they will need feeding, provided by you in the form of weak seaweed solution or a diluted liquid organic tea.
When the seedlings are about 10 cm tall, or when they have 2 sets of true leaves, plant the biodegradable pot straight into your prepared garden bed (if the outdoor temperature is suitable); or (from punnets) prick out each seedling individually and plant this into the prepared garden bed.
IN-DIRECT (3-step) SEED SOWING
This is used for seeds of plants grown over summer & started much earlier, while waiting for the outdoor soil to become warm enough. I use this method for growing tomatoes, eggplants, capsicum and chilli.
STEP 1
Sow the seed in individual jiffy pellets and keep them warm. Use old strawberry punnets to create a ‘mini-greenhouse’.
STEP 2
When the seedling has germinated you will need to take them from their indoor heat spot immediately and place them where they will still stay warm but where they get some sunlight.
Keep them protected if the nights are cold.
Once you start to see roots at the sides of the jiffy pellet, pot up the jiffy pellet straight into a biodegradable newspaper pot or individual tube pot with good potting mix added.
The seedlings will continue to grow in these while waiting for the soil temp to warm up. Keep them in a sheltered outdoor position, covered if the weather is still very cold. Regular liquid feeds (Seasol, worm wee, diluted Charlie Carp etc) will help keep them growing strongly.
STEP 3
When the soil has warmed up adequately, plant them into their permanent position. You may still need to protect them from cold nights if you are planting early for summer.
HINTS for success
- In step 1, plant what you need plus a few more in case of some failing to thrive.
- Water the seedlings in step 2 with a cooled chamomile tea. This helps prevent “damping-off”, a fungal problem with seedlings.
- Make your own “watering can” suitable for seedlings using a plastic milk bottle with holes pierced in the lid or use a bottle top waterer.
- To warm up outdoor soil, keep mulch pushed away so the sun can heat the dark soil.
Other hints
- Some larger seeds benefit from being soaked overnight prior to planting out eg beetroot, legumes, sweetcorn
- Anticipate a 6-10 week process from the sowing of the seed to it being ready for the point of planting out, compared to buying seedlings.
- Collect toilet paper rolls for sowing sweetcorn or sunflower seeds as they like to put down deep roots. Use potting mix.
- For most vegies, it is worthwhile growing from seed, but others, such as the onions, you get so many in a punnet that you may as well buy seedlings, unless you are after a particular variety not available as seedlings. If you do grow from seed, use In-Direct (2-step) method, but plant out after the initial germination (no need to plant on before going into soil).
- Some seed needs to be fresh and should be purchased every year
eg sweetcorn, parsnip - Some seeds are now available in seed tapes or seed mats, making the spacing and sowing much easier.
- If you want to make sure seed is viable before sowing, place some between 2 wet sheets of kitchen paper towel in a closed plastic container, kept indoors. Check daily to see if they have germinated. If they haven’t after a week, they probably are out of date.
To make simple biodegradable pots, follow this link.
Or for my instructions on making the origami style biodegradable pots out of newspaper, search YouTube: BiodegradableNewspaperPots
Timing Chart (Reference: Sow What When Chart – Diggers)
|
COOL SOIL 10OC+ |
SOWING METHOD |
MILD SOIL 12OC+ |
SOWING METHOD |
|
Broadbeans |
Direct |
Beetroot |
Direct |
|
Broccoli |
Indirect (2-step) |
Cabbage |
Indirect (2-step) |
|
Kale |
Indirect (2-step) |
Carrot |
Direct |
|
Leek |
Indirect (2-step) |
Cauliflower |
Indirect (2-step) |
|
Onions |
Indirect (2-step) |
Celery |
Indirect (2-step) |
|
Pak Choy |
Indirect (2-step) |
Lettuce |
Direct or Indirect (2-step punnets) |
|
Peas |
Direct |
Rocket |
Direct or Indirect (biodegradable pots) |
|
Radish |
Direct |
Silverbeet |
Direct or Indirect (2-step) |
|
Spinach |
Direct or Indirect (biodegradable pots) |
Coriander |
Direct or Indirect (biodegradable pots) |
|
Spring Onion |
Indirect (2-step punnets) |
|
|
|
WARM SOIL 15OC+ |
SOWING METHOD |
VERY WARM SOIL 18OC |
SOWING METHOD |
|
Beans |
Direct |
Capsicum |
Indirect (3-step) |
|
Sweetcorn |
Direct (toilet rolls) |
Chilli |
Indirect (3-step) |
|
Cucumber |
Direct or Indirect (biodegradable pots) |
Eggplant |
Indirect (3-step) |
|
Pumpkin |
Direct or Indirect (biodegradable pots) |
Rockmelon |
Direct or Indirect (biodegradable pots) |
|
Tomato |
Indirect (3-step) |
Watermelon |
Direct or Indirect (biodegradable pots) |
|
Zucchini |
Direct or Indirect (biodegradable pots) |
|
|
|
Basil |
Direct or Indirect (biodegradable pots) |
|
|