Drying Herbs & Chillies
You might recall the scam of 2016 when it was uncovered that when people are buying dried oregano in packets, it might be anything but that. Dry and dusty and flavourless – and that’s the case even if it were real oregano being sold. Far better to grow – and dry – your own.
Most herbs that I have in my garden I prefer to use fresh. Apart from basil and sometimes mint, they are available year round and I think they taste better fresh – except oregano.
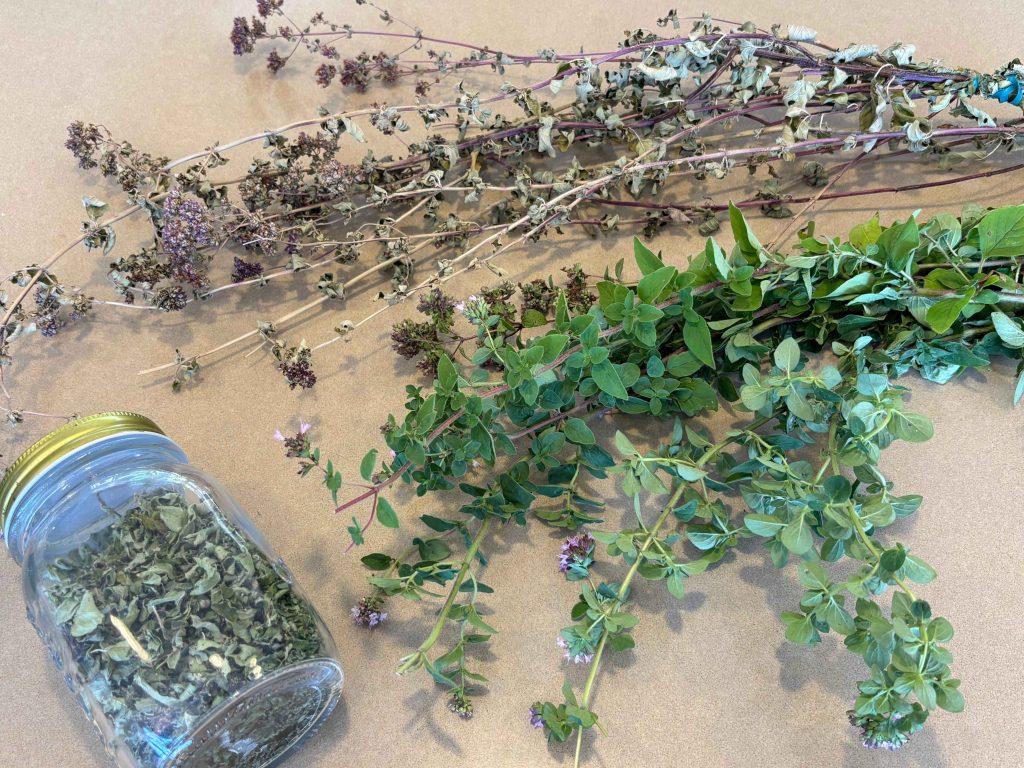
The flavour when fresh is not very inspiring but when dried, it lifts so many dishes with its intensity. Oregano is a woody-stemmed perennial herb which has self-sown all over my garden, so I make the most of its abundance by drying and storing it to use throughout the year.
Drying it is simple and needs no special equipment. Cut the stems in summer. They will have flower buds on the end and I try to cut them before the buds open. This is a tip I took from my father. Not sure if it makes any difference to pick before or after flowers have started but I do know that harvesting once flowers are open is a bit more hazardous because the bees love the flowers and they’re always buzzing around them.
Wash the long cut stems and pat dry. Then tie loosely with some string and hang them up somewhere out of direct sunlight. You could use a garden shed or garage but I prefer hanging them in my laundry. There the likelihood of them getting all dusty again is less likely. It will take several days for the leaves to be bone dry and crispy.
At this stage, take it down and rub each stalk free of its dried leaves and flowers over a tray or large sheet of paper. If it is properly dry this is easy to do. It must be at this stage otherwise it will quickly go mouldy in storage. That’s it! That’s all you need to do.
DRYING CHILLIES
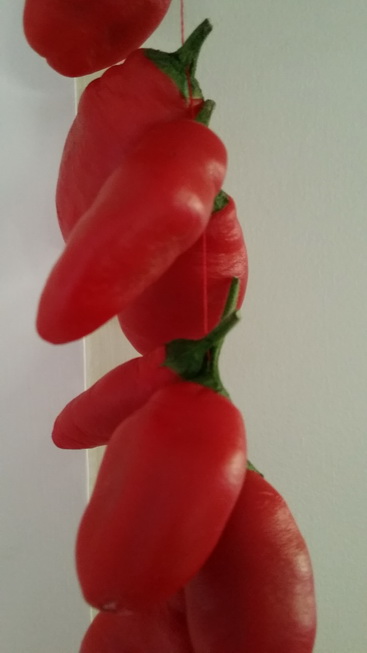
Drying chillies from your garden is even easier. You could put them in a dehydrator, but they make a decorative statement in your kitchen if you air-dry them. This is done by stringing them up. Forget fiddly knots around each one but dig out a sharp sewing needle and some thin thread and get to work. After knotting one end of the thread. sew through the green stem end of each chilli. They will overlap but do give them some space by not forcing them down too tightly to dry more thoroughly.
Complete dryness might take several weeks, especially if you leave them indoors (out of direct sunlight). You can speed it up a bit if they hang in a sheltered spot outside. Once completely dry to the point of being crispy, you can take them down and store in a container; or, for chilli flakes, put them in a coffee grinder, preferably one that doesn’t get used for coffee! Or you can simply leave the dried chillies hanging and take each one off as needed.